Here’s a confession that’ll sound familiar to anyone who’s ever tried to chase the perfect golden glow: you buy the product, you slather it on, you head for the sun, and somehow, you end up looking like a patchy, slightly-pink version of yourself. What went wrong?
Nine times out of ten, the answer has nothing to do with the tanning product and everything to do with what you did (or didn’t do) before you applied it. Skin prep is the unsung hero of a beautiful tan. It’s the stuff nobody shows you in the glossy ads, but it’s the step that separates a dream tan from a disappointing one.
If you’ve ever browsed the premium tan accelerator collection at Carrot Sun and wondered why a formula that works wonders for your friend just sort of… fizzles on you, the answer is probably in your prep routine. Because even the best accelerator in the world can’t do its job on skin that isn’t ready for it. So let’s walk through the routine your skin actually wants, step by step.
Why Prep Matters More Than the Product
Think of your skin like a canvas. If the canvas is bumpy, dry, or covered in dust, even the most expensive paint will look streaky. The same rules apply to your tan. Dead skin cells, leftover product residue, dehydration, and dry patches all act as little roadblocks for the melanin your skin is trying to produce. Your accelerator wants to reach the living layers of your skin underneath; prep clears the runway.
And here’s a bonus you might not expect: well-prepped skin holds onto a tan longer. That golden glow sticks around for days or weeks instead of washing off mid-shower. Worth the five extra minutes, wouldn’t you say?
Step 1: Exfoliate, But Not Like You’re Sanding a Floor
Exfoliation is step one for a reason. Getting rid of dead skin cells creates an even surface for your tan to develop on, which means no weird streaks and no premature fading. The trick is to be consistent without being aggressive.
Gentle is the keyword. A soft body scrub, a loofah, or even an exfoliating glove a day or two before your tanning session is plenty. Pay extra attention to the usual rough spots: elbows, knees, ankles, and the tops of your feet. These areas love to hang onto dead skin, and they’ll absorb product unevenly if you skip them.
One thing to avoid: exfoliating right before you tan. It can leave your skin a little too sensitive and reactive under the sun. Give it 12 to 24 hours to settle, and you’ll get the best of both worlds.
Step 2: Hydrate From the Inside (Yes, Really)
This one gets skipped constantly, and it’s a mistake. Dehydrated skin tans unevenly, fades faster, and is more prone to burning. A lot of the “streaky tan” complaints come down to skin that simply wasn’t hydrated enough beforehand.
Start upping your water intake a day or two before you plan to tan. Your skin is your largest organ, and it looks plumper, softer, and more radiant when it’s actually hydrated. Tanning products then have something to work with, rather than trying to develop colour on a surface that’s already stressed.
Pair this with a light, non-greasy moisturiser on exfoliation day. You don’t want heavy creams clogging your pores right before a session, but a little hydration goes a long way.
Step 3: Shave or Wax Ahead of Time
Nobody talks about this, but timing your hair removal matters. If you shave right before tanning, you strip a fine layer of skin along with the hair. That freshly-exposed skin is way more sensitive to UV exposure and irritation.
Shave or wax at least 12 hours before you apply an accelerator. This gives your skin time to calm down so it can respond to the product without getting cranky. And if you’re waxing, the industry standard is 24 hours minimum. Listen to your esthetician on this one.
Step 4: Clean Slate, No Lotions or Perfumes
Here’s a small detail that trips up a lot of people: applying your accelerator on top of whatever moisturiser, deodorant, or body spray you used that morning creates a barrier. The active ingredients in your accelerator need direct contact with your skin to do their work.
Before you tan, hop in the shower, rinse off, and skip the scented body products. Some perfumes and deodorants can actually cause skin discolouration when exposed to UV light, a phenomenon called phytophotodermatitis. It’s not common, but it’s a thing, and it’s annoying when it happens. Keep your pre-tan canvas clean.
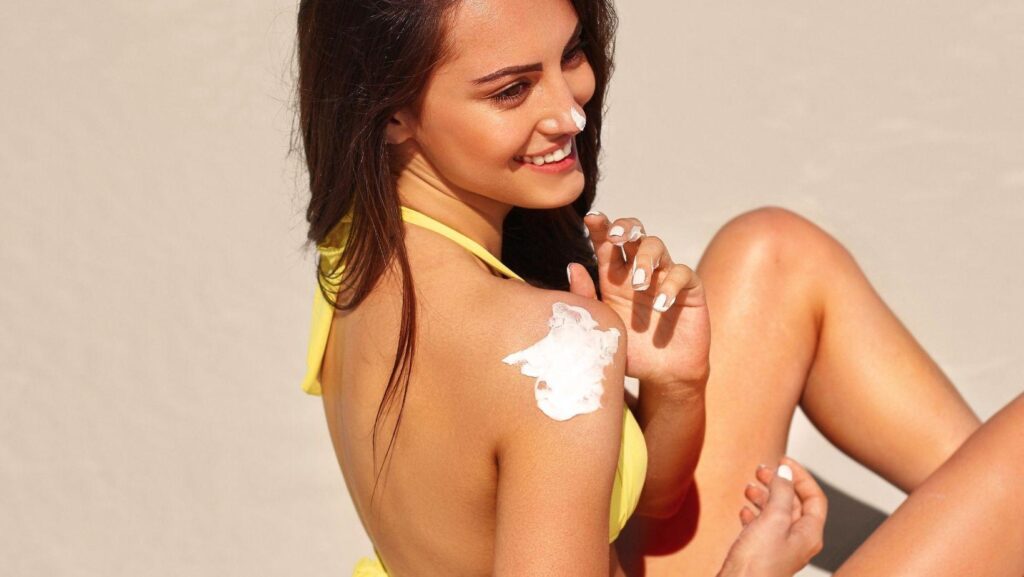
Step 5: Apply Your Accelerator the Right Way
Now the fun part. When you apply your tan accelerator, don’t just slap it on and run outside. Take your time. Work it into your skin in circular motions, paying attention to the areas that typically tan unevenly: the backs of your hands, your shins, your chest.
Use enough product to cover your skin, but not so much that it’s sitting in puddles. A thin, even layer is your goal. And let it absorb for a few minutes before you head out or hit the sunbed. Giving it a minute or two means you’re not wiping it off on your towel or clothing before it’s had a chance to get to work.
Keep in mind that tan accelerators don’t replace sunscreen. They’re teammates, not substitutes. Apply your SPF over the top, especially for any outdoor session. Your tan will still develop, you just won’t pay for it later with peeling, redness, or long-term sun damage.
A Quick Note on Skin Type
Fair skin generally needs a gentler approach and shorter sun exposure. Sensitive skin benefits from fragrance-free, hypoallergenic formulas. Oily skin does better with lightweight, non-comedogenic products. Dry skin loves the richer, oil-based accelerators that hydrate while they work. Picking the right formula for your skin type is half the battle, and if you’re unsure, it’s always worth a quick chat with a brand that knows its stuff.
After You Tan, Keep the Momentum Going
Prep is half the equation. The other half happens afterward. Once your session is done, hop in a cool (not scorching) shower to rinse off. Follow up with a hydrating body lotion or an after-sun product to lock in moisture. Skin that’s hydrated post-tan holds its colour longer and fades more gracefully, so you’re not dealing with patchy flaking a week later.
And keep exfoliating lightly between sessions. Not enough to scrub your tan away, but enough to keep your skin smooth and healthy. The goal is a glow that looks intentional, not one that announces itself with streaks.
The Takeaway
A beautiful tan isn’t luck. It’s a series of small, intentional steps that set your skin up to do its best work. Exfoliate gently, hydrate thoroughly, keep your pre-tan skin clean, apply your accelerator properly, and follow up with aftercare. Your skin will reward you with a tan that actually looks like what you were hoping for.
And the next time someone compliments your glow? You’ll know it wasn’t the product alone. It was the prep.